Your comments are appreciated. If worst comes to worst I have a few mates who are into their karting. One of their engine builders has a shop about 20 minutes away from me. Maybe they can blueprint and balance my engine while I'm there...!!! I'll check with my local mower shop. They're pretty bloody good, so I'll see.
I had half thought of putting on EI. That would require removing the flywheel? I don't have a whole lot at my disposal to get that off, let alone the correct tools. I'd hate to crack it, it's in really good nick.
I'm starting to think I should not have powder coated my Scotty! It really doesn't see water, and I love the finish, but I'll be keeping an eye on it. What are your collective thoughts regarding vapour blasting? Again, just throwing ideas around, but getting the deck blasted that way could leave it with a really cool finish. Kinda factory, kinda not. Bitumen paint the carrier and deck underside and it'll probably outlast me.
Bring on that service manual.
I don't collect mowers. I just require Multiple Mowing Solutions™.
Your comments are appreciated. If worst comes to worst I have a few mates who are into their karting. One of their engine builders has a shop about 20 minutes away from me. Maybe they can blueprint and balance my engine while I'm there...!!! I'll check with my local mower shop. They're pretty bloody good, so I'll see.
They'll have the gear to give your barrel a hone, so get that done. If this cleans up the bore OK, and the bore is not worn 'oval' near the base, no need to rebore it!
Edit: the Garfield bloke I mentioned earlier charges $90, for a rebore and hone only. Customer has to source and supply the piston kit. Not bad value; the GA Spares kit for your motor seems to run $140-180 [changeover basis] from online dealers.
Quote
I had half thought of putting on EI. That would require removing the flywheel? I don't have a whole lot at my disposal to get that off, let alone the correct tools. I'd hate to crack it, it's in really good nick.
Flywheel removal on a Victa full crank doesn't require many tools anyway [unless the rust gremlin has been to visit] - just two flat blade screwdrivers, and a 13/16" AF socket to undo the retaining nut. It doesn't seat on a shaft taper; the shaft is parallel, and has a keyway for a square section steel key cut in it. The later external coil full crank engines didn't even have a key, just a flat machined on the shaft, and a 'D' shaped flywheel bore to match.
PS: Haven't used 'vapour blasting', but my bike mechanic recommends soda blasting for alloy components; and bead or grit blasting for steel components, depending on the surface finish desired.
Last edited by Gadge; 24/04/2009:12 AM. Reason: Add rebore costs
Cheers, Gadge
"ODK Mods can explain it to you, but they can't understand it for you..."
"Crazy can be medicated, ignorance can be educated - but there is no cure for stupid..."
Tyler and Gadge, cheers. I ended up with a 13/16th impact socket "just in case". Didn't realise it'd be that simple to remove the flywheel. And if just splicing in a wire or two will give me EI, I will perhaps just do that.
Slow going otherwise. I've ordered some parts (gaskets, muffler, drive belt) from ODK for a start. I'm hoping they will arrive not to long after my manual. Fingers crossed! Going to try to clean up the engine and deck a bit this weekend.
I don't collect mowers. I just require Multiple Mowing Solutions™.
Here's a pic of how to position the screwdrivers. This is an external coil 160, which still has contact points under-flywheel, but the same technique applies to the coil-under-flywheel models. I haven't removed the nut for the pic, but you'll see the ratchet drive in the background, with a 13/16" AF spark plug socket on it.
The vital bit of this method is, the flywheel is raised by lifting the handles of both screwdrivers upward simultaneously. If it doesn't move straight off, you can apply a 'rocking' motion by alternating the upwards pressure - that usually shifts them.
This technique isn't mentioned in any of the workshop manuals, but it sure works a treat!
Cheers, Gadge
"ODK Mods can explain it to you, but they can't understand it for you..."
"Crazy can be medicated, ignorance can be educated - but there is no cure for stupid..."
Gadge, I find those generally just lift of, maybe with a bit of a tap on the side. It is a good design, it is the earlier one that I have to use a puller on, some of those can be super tight on the taper.
Agreed, these external coil flywheels almost always come off very easily.
Back in the heyday of the coil-under-flywheel FC Victas, the workshop in my family's Cobram, Vic OPE business [we owned it 1973-83] used this 'two screwdriver' method as routine, and rarely had to resort to the screw type puller.
I'd guess that you'd encounter more 'rust-bound' flywheels on these motors now though, than we did back then. Because these flywheels actually aren't on a tapered shaft, they are actually more prone to becoming rust-bound, if any water gets in there.
Cheers, Gadge
"ODK Mods can explain it to you, but they can't understand it for you..."
"Crazy can be medicated, ignorance can be educated - but there is no cure for stupid..."
Had to read a few things two or three times to understand what the manual was referring too, but a lot came off the mower today.
This one really is in good condition. Besides having the wrong belt installed, the only other problems I have come across have been two broken rivets holding the steel safety skirt that sits over the rear axle, and the clips that hold the pulley cover on are missing. That would suggest the non-standard Tinnerman nut and screw arrangement?
I do have some questions relating to the tear down.
1. What is the suggested method to remove the handle bars? 2. Can the catcher flap be removed simply by tapping out the rod? 3. The upper end of the clutch cable, according to the manual, can be removed from the handle by tapping out the little bit of meta (roll pin)l. I cannot be sure I'm tapping out the correct part - it seems it will be tapped into the black plastic handle? Alternatively, can the push on fix be pulled off the pivot pin? Seems pretty stuck fast when I'm using a little pry bar. I will admit to not putting too much effort into it so I don't break the 40 year old plastic handle. 4. Speaking of push on fixes - can the one one the deck securing the height adjuster spring be removed without damaging it? What is the best way to remove and what is the correct replacement if I do damage it? 5. Are these the correct part numbers for the front axle bushes? CH80603A, CH82399A. The replacement I'm looking at is Jak Max branded from ODK. Might as well replace while it is apart.
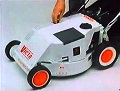
Attached are some pictures for those following along at home.
I don't collect mowers. I just require Multiple Mowing Solutions™.
Taking your questions in order, and referencing the Exploded Diagram on p.122 of your #424 Manual;
1. Remove the top section of the handle, by undoing nut #81, and withdrawing the Locking Bar #82. Then remove the Latches, #23. Note how the spring #24 is fitted, and preferably take a pic before pulling it apart. IIRC, the Latches are retained by an e-clip on the end of the spindle. Or it may be necessary to remove nut #28, and remove the Latch and its Bush as an assembly.
The two lower handle halves can now be removed; again IIRC, these may also have an e-clip retainer, on the end of the pivot pin.
2. No. It has an e-clip retainer, #76, which has to be removed first. The position of the e-clip groove can be seen in the pic of the rod, #10. It can then be drifted out - I'd start off with a pin punch and medium-weight hammer.
3. Correct - the roll pin has to be drifted into the handle; ref. Diagram on p. 130. It will then be necessary to get the roll pin out completely, from the inside of the handle - a pair of needle-nose Vise-Grip pliers is very useful for such tasks [also great for removing e-clips]. It may be necessary to remove the Pivot Pin to accomplish this.
4. Sometimes! These 'push nuts' are really intended as 'single use'. My most successful technique with these, is to grip the outer edge in a pair of Multi-Grip or Vise-Grip pliers, and 'rock' the nut while pulling upwards.
5. Ask Bruce at the ODK Shop - he will know.
Cheers, Gadge
"ODK Mods can explain it to you, but they can't understand it for you..."
"Crazy can be medicated, ignorance can be educated - but there is no cure for stupid..."
Having been a mod and long term poster for a forum many moons ago, I understand the effort you (and others) have gone to in order to continuously lend a hand here. I have never worked on this handlebar arrangement before, so while it may be easy as pie to some, it had me scratching my head as to where to start. I can't thank you all enough!
Going to give it all a crack now, and start the crappy process of cleaning.
I don't collect mowers. I just require Multiple Mowing Solutions™.
Ps - Sorry I can't be of any help with the SP side of things - I have always seen SP mowers as too complicated for my own use and have thus far avoided like the plague
There was no E clip keeping the catcher flap rod in place - another little piece of the puzzle missing. So that was easy to remove. Handles all removed, forgot to tap out the roll pin from the clutch lever, but that doesn't really matter.
Most the day was taken up degreasing the drive wheels. Holy hell, that isn't something I want to do again. Three cans of degreaser later, a smidgen of petrol and I think that is the best I'm going to get them with what I have to hand without asking the environment to take another one for the team...
Deck came up pretty bloody well. A bit of degreaser on that and a brush and scrubbed. Pressure washed off. Still managed to keep the original "Press to Prime" sticker pretty well intact. As a bit of an amateur photographer, forgive me for taking before and after shots in different light.
Tyler - I really only wanted a VC160 or Mustang. But beggars can't be choosers. I have no need for SP, don't really want it but getting the gearbox and ancillary bits apart, cleaned and reassembled correctly will be a new challenge. Hopefully, it'll "preserve" it for a few more years too.
I don't collect mowers. I just require Multiple Mowing Solutions™.
Yep, that looks like Moly grease in those wheels - filthy stuff to remove! Bit late here, but a 50/50 mix of petrol and diesel works well at shifting it.
I used to have to do that on the CV joints, and inside the steering knuckles, on the front end of my old FJ45 Landcruiser when I serviced it. It was quite a regular job, as I used to take that truck through river crossings up in the High Country quite frequently, back in the day. I was buying 2.5kg pails of Moly grease, for that job.
The thing about that grease in your wheels though is, it shouldn't have been there! The manual says 'Grease the Dust Seals with Multi Purpose Grease. Do not grease the gear teeth.'
Cheers, Gadge
"ODK Mods can explain it to you, but they can't understand it for you..."
"Crazy can be medicated, ignorance can be educated - but there is no cure for stupid..."
Tyler - I really only wanted a VC160 or Mustang. But beggars can't be choosers. I have no need for SP, don't really want it but getting the gearbox and ancillary bits apart, cleaned and reassembled correctly will be a new challenge. Hopefully, it'll "preserve" it for a few more years too.
I agree Mystyler - I couldn't have passed it up either given its condition - its great you are preserving it as opposed to others who may have just bought it to run into the ground
Gadge, I was unsure if petrol or your 50/50 would eat at the plastics. I'd didn't think it would, but I didn't want to chance it. Absolute PITA it was. And I read that part in the manual as well!!! Dust seals will be getting grease and not much else. However, would the teeth benefit from a very, very light layer of...something? In the interest of longevity.
Tyler, she'll be looked after. Still unsure which way to go with the "restoration". If I don't paint the deck, perhaps a clear coat to stop the Al from corroding and pitting?
I don't collect mowers. I just require Multiple Mowing Solutions™.
Gadge, I was unsure if petrol or your 50/50 would eat at the plastics. I'd didn't think it would, but I didn't want to chance it. Absolute PITA it was. And I read that part in the manual as well!!! Dust seals will be getting grease and not much else. However, would the teeth benefit from a very, very light layer of...something? In the interest of longevity.
Not really. It's apparent that the wheel centres are moulded from one of the 'engineering plastics', most likely one of the Nylon resins [i.e. thermoplastic polyamides]. As such, these resins have considerable 'self-lubricating' properties, and abrasive dirt doesn't stick to them.
If you must apply lube, I'd suggest a 'dry-coat' Teflon based spray. Easily the best of these I've used, is one that Jaycar Electronics sell under their house brand.
Quote
Tyler, she'll be looked after. Still unsure which way to go with the "restoration". If I don't paint the deck, perhaps a clear coat to stop the Al from corroding and pitting?
Yep, even a rattle can clear coat will help to preserve the original finish. Try to pick one that's petrol-resistant if you can, though. The Rust-Oleum brand is usually good.
Cheers, Gadge
"ODK Mods can explain it to you, but they can't understand it for you..."
"Crazy can be medicated, ignorance can be educated - but there is no cure for stupid..."
I have a 1972 VC Autodrive with the SP system removed. It's in very good physical condition but without it's SP specific catcher. Is it better off being parted for it's remaining good bits like the wheels, engine base, handlebars and green engine cover?
Ahh, if only victa had kept producing the thumblatch catcher series, they would be in better shape today!
Thanks again Gadge, I'm also in contact with Bruce @ ODK.
I might try to get the rest of the grease off with a bit more fuel and a nylon brush. Thankfully my local council will properly dispose of waste fuel and oil in appropriate containers for no charge.
Mowerfreak, I'm in two minds about this sort of thing. If the mower is in working condition, half of me says keep it going. The other half thinks that if it can complete others, maybe it's worth a part out. I could come up with a dozen arguments for either side. It looks in pretty decent nick, and I do love those embossed early bases.
Haven't really progressed much. I did get some of my car care products out (a shameless plug for Bowden's Own here, and they're Aussie made and owned!) to see what I could achieve with some of the chrome work. I'm actually amazed at what I managed to do with a couple of cloths and some cleaner, metal polish and sealant. Almost all the surface rust has been removed, even though some of the chrome is flaking off in some parts. Kinda fits this rebuild though. Worn, used character, but solid. I couldn't really take any decent photos in the evening light. Now that I know I'm not wasting my time, I might really get stuck into it.
I don't collect mowers. I just require Multiple Mowing Solutions™.
With dirty fuel, it's not hard to just set it outside in an open tin, and set it alight.
Or if you want to reuse it for further cleaning, a cheapo paper vacuum cleaner bag will filter out the dirt - that's what I've used for years, on used parts cleaning fluids. My 'parts wash' trough is a cut down re-purposed home heating oil tank, with cut down legs, and a ball drain valve in the bottom. So it's easy to filter the used fluid as it drains out.
Back in the day, when we had petrol that had been used for parts cleaning to get rid of from the family OPE business, we'd just take it out to the local tip, when we took out the surplus mower cartons and shop/workshop rubbish.
The council back then didn't mind if you set cardboard rubbish alight. I can bear witness that a mower box full of petrol vapour goes up in a quite spectacular fireball!
BTW, a fast way to scrub rust off chromework is with a scrunched up piece of aluminium foil, dipped in water + detergent.
Cheers, Gadge
"ODK Mods can explain it to you, but they can't understand it for you..."
"Crazy can be medicated, ignorance can be educated - but there is no cure for stupid..."
Petrol was pretty easy to get rid of when we had a farm. Many a, "voooomph" was had. Slightly harder in suburbia these days, maybe when the next Milo tin is emptied it can be repurposed.
While aware of the alfoil method, I've never tried it. I'll be giving it a go on the upper handle bar half. I also got out the Dremel yesterday, and I've got a tiny wire brush attachment for it, and a soft polishing attachment. Between all of this, I reckon they're going to come up pretty well. My SB45 bars were so cooked they needed to be rechromed and that cost a small fortune.
I was not aware of the vacuum bag trick. That one I'll certainly be saving for later, cheers Gadge.
Might look at dropping the head and cylinder off to be vapour blasted today, and I'll try to tidy up the block and piston myself. I don't really want to split the crank case if I don't have to.
I don't collect mowers. I just require Multiple Mowing Solutions™.
OK, hit a little road block. I'm trying to remove the pulley off the crankshaft.
The service manual says to rest the pulley on a block of steel and hit the opposite side with a hammer to break the taper. OK, I don't have a steel block, so tried the old muffler with no joy. The heaviest hammer I have is 500g and I don't want to do any cold forming!
I do have a three jaw, 4" puller...? It fits...but will it result in damage?
No, pullers do not work on these! If you don't have a heavy block of solid steel [e.g like my anvil]
to use as backup, a club hammer or sledge hammer/ block splitter head will work.
Cheers, Gadge
"ODK Mods can explain it to you, but they can't understand it for you..."
"Crazy can be medicated, ignorance can be educated - but there is no cure for stupid..."
What about an air powered palm hammer normally used for hammering in confined spaces. Mine has got me out of trouble a couple of times. It uses several percussive hits per second. I've knocked out large rivet centres with ease as well as knocking back the metal bracket onto the base of the side window glass of my car, where a regular hammer wouldn't. Worth a try on this.
Ahh, if only victa had kept producing the thumblatch catcher series, they would be in better shape today!


![[Linked Image]](https://www.outdoorking-forum.com.au/forum/ubbthreads.php/ubb/download/Number/13180/filename/IMG_0812.JPG)
![[Linked Image]](https://www.outdoorking-forum.com.au/forum/uploads/usergals/2015/04/full-5630-21056-anvil_01b.jpg)


