As many on this forum probably already know, I'm a big one on originality and nothing tickles me more than an item that's been restored to as close as can be to the original unit, thus I'm sure we are going to see something really great here. I must admit I've always liked the look of the larger tank on the Kirby when fitted to a 17 or 20 inch machine, but in saying that it would certainly look overkill on a 14 due to the smaller size machine that it would be sitting on. So in saying that your 14 inch machine will be perfect looking in all proportions.
So,.........Lets call it Marilyn with all the curves in the right places.
Cheers, BB.
I live a 24 Hour lifestyle, but every now and again I seem to fall asleep, well at least that's what my wife tells me.
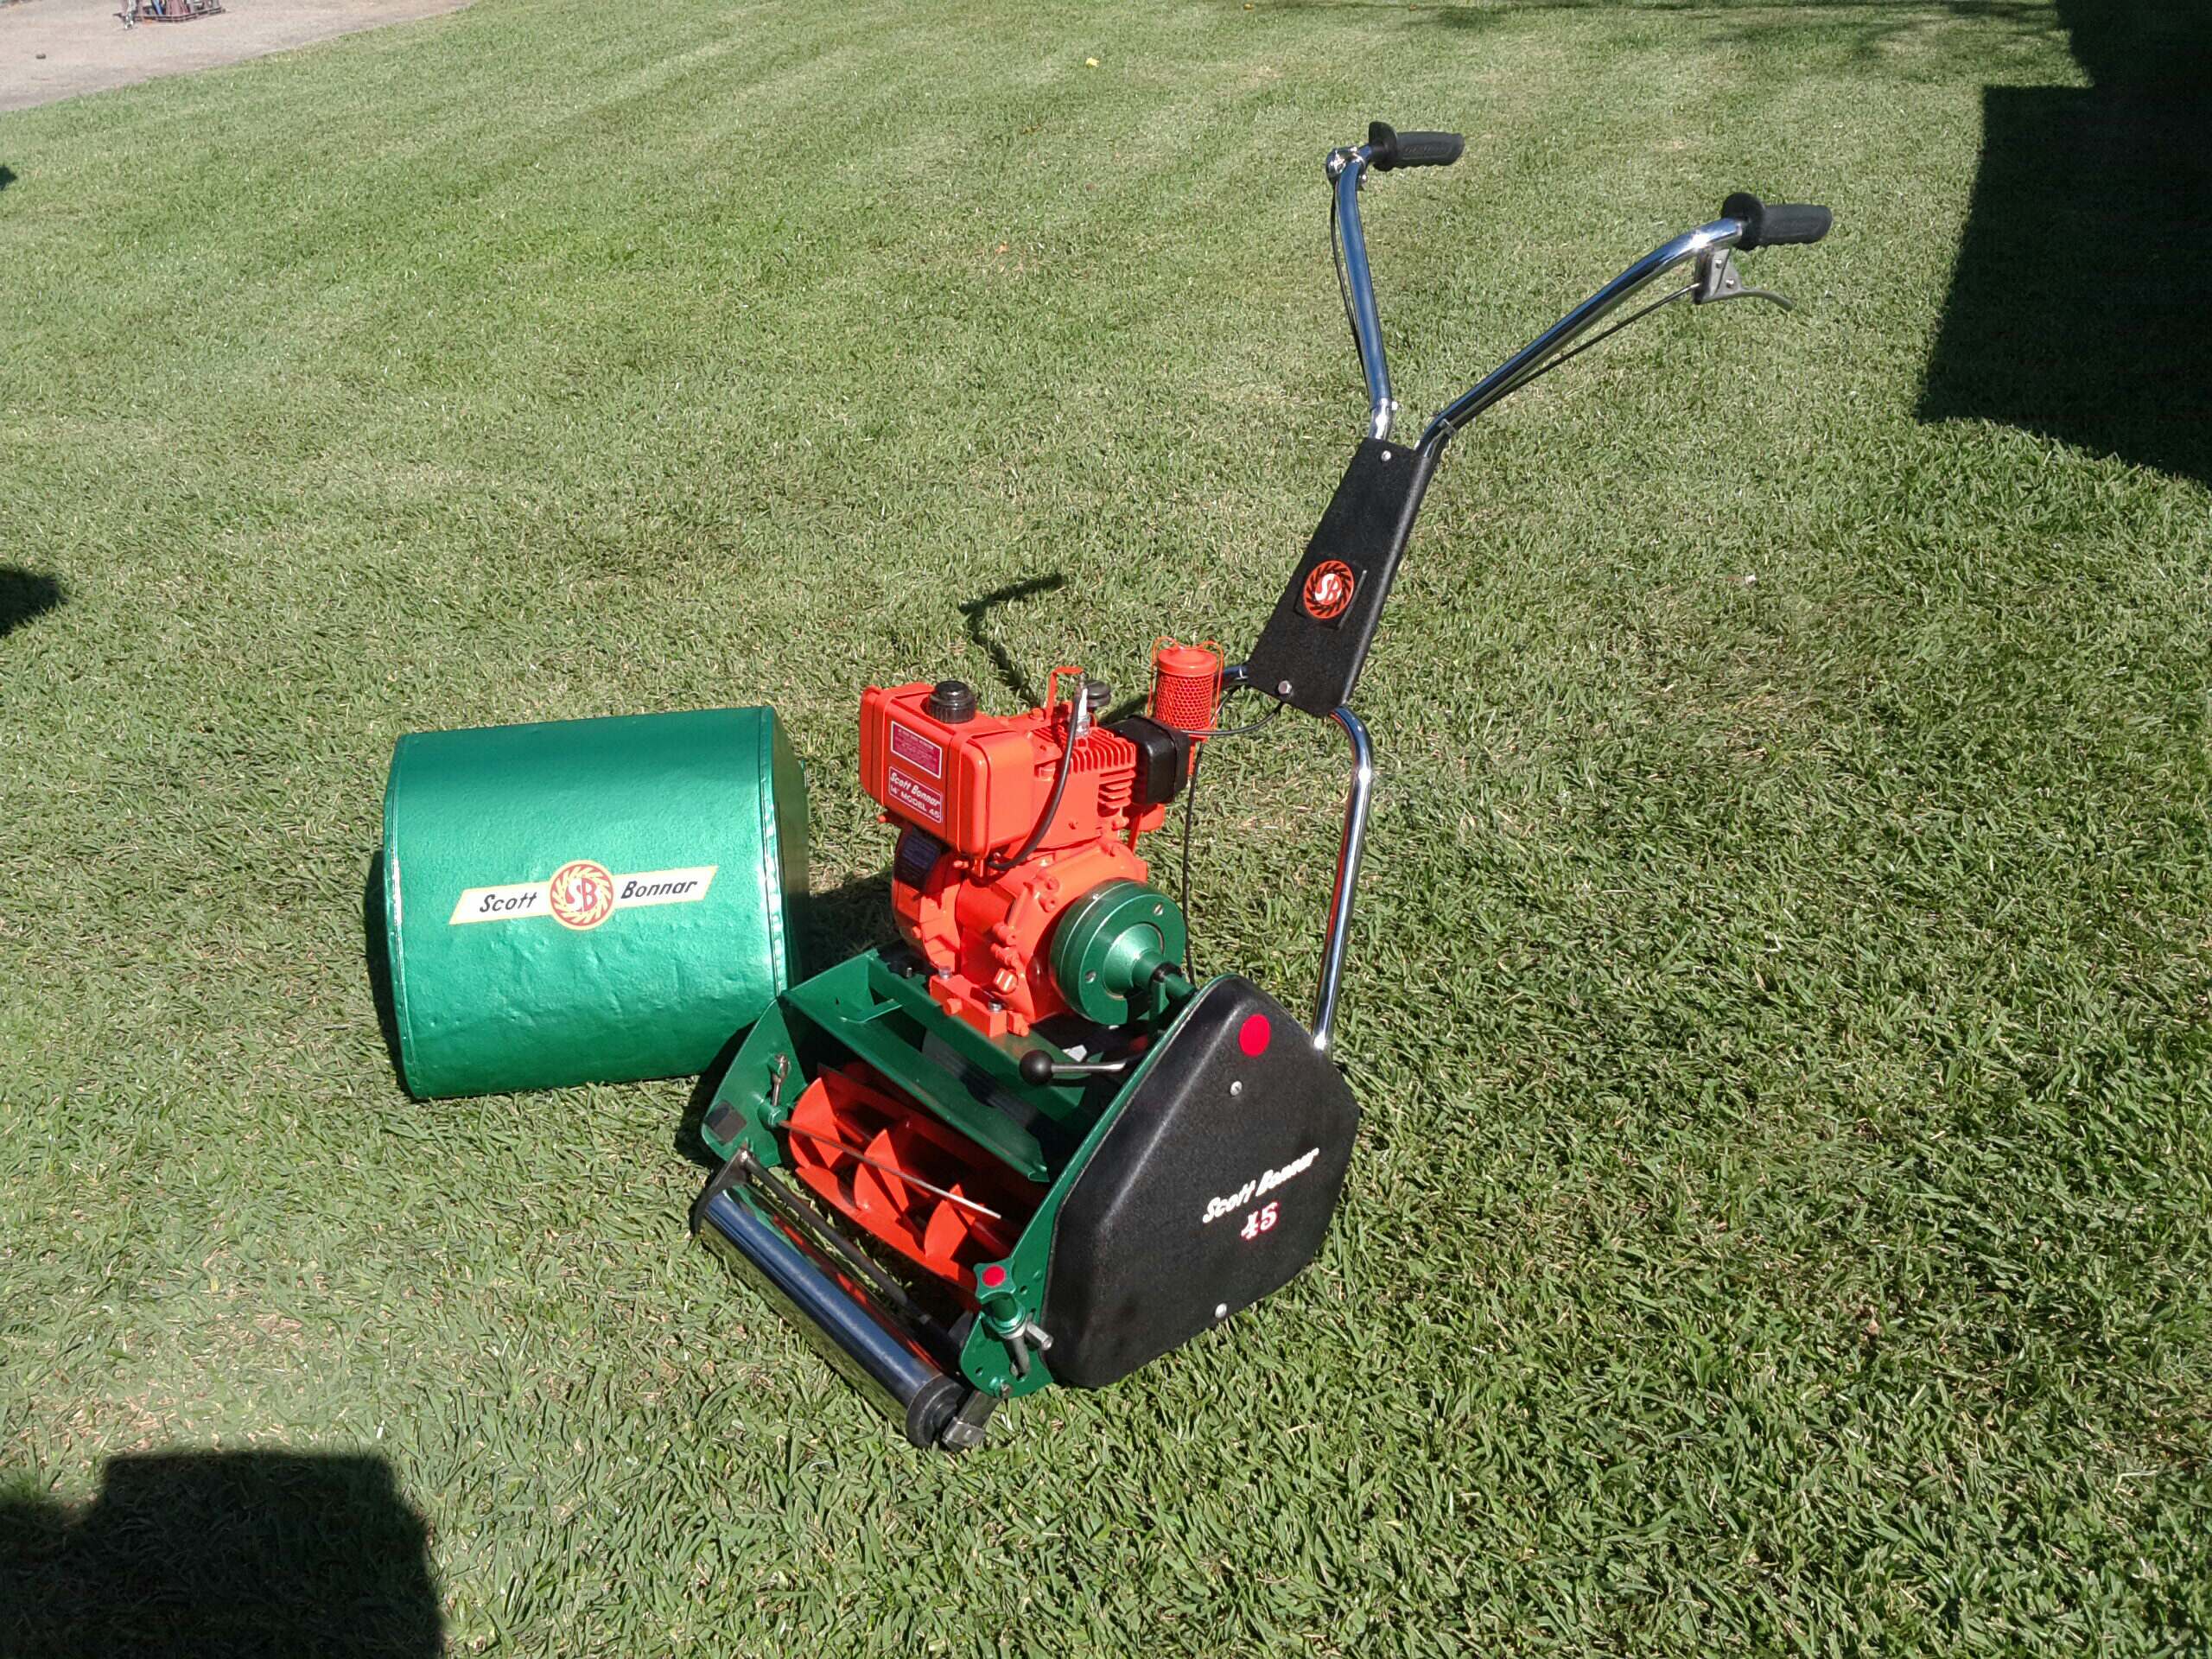
That's the plan, I think the challenge with these things is the detail and trying to get it spot on as close to original as possible. I have been known to be a perfectionist and if I just wanted to get it going really quick I could of chucked the 2hp Briggs on painted it black and painted the base deck red and turned it into a Rover. Funny you mention the tank, my original was rusted out inside and the filler spout was rusted away to buggery I managed to find a replacement on E-bay that was mint inside for a decent price. Had it been the larger full size tank I probably still would of bought it as I was a little worried I wouldn't be able to source one. I definately agree with it looking out of proportion these Kirby's are a chunky engine and even this little 2hp looks like a 3 sitting on the smaller 14". I still love the looks of the Kirby over the Briggs, you see Briggs everywhere but when you see that Kirby it's like seeing an EH Holden instead of a VW Beetle.
I got that kill switch done, and I'm more than pleased with it. I found under one of the head bolts the old snapped kill switch and worked out it's 12mm wide so I found an old offcut from some guttering I had in the shed and cut 12mm off the end. I bent it to the height of the spark plug and rounded off the ends using the old snapped metal as a templet and it springs back perfect. I sanded back the ends that need to make contact to ground with the spark plug and the head bolt as it was colourbond taped them up and painted the rest.
Last thing left is the baffle inside the muffler, the materials arrived today to make it so I will post that when I get that done. Hoping my idea works as I have no idea how the original even looks, just going off the SB parts diagram uploaded to this site and some images on Google from car exhaust.
I quickly whipped this up this afternoon, any thoughts? I have nothing to work on except this manual attached. It had a small portion of thin metal plate tac welded inside the outer cup of the muffler but it was so rusted there was literally nothing left. I imagine it to be 2 seperate chambers so the gases are trapped in the first chamber then goes through the screens to muffle the sound then exit the screen via the second chamber. The baffle I made is all stainless and seems to fit well, will this work?
Parts 68 & 69 are what I have constructed this idea from, would still love to see a complete one to know how it goes.
Hi Bon_Scott, Mod BB and members I hope you sort this - to help others.
There is sure a BIG difference between a 'Hush-Tone' baffled muffler and one where the baffle has rusted away.
Quote
left. I imagine it to be 2 separate chambers so the gases are trapped in the first chamber then goes through the screens to muffle the sound then exit the screen via the second chamber
I wish I understood muffler theory. What you say is how I imagine it. That's a great job on that inner first baffle.
Thanks I'm happy with the outcome, if I knew what the original looked like I could replicate it. That diagrams the only indication of how it would of been assembled. I found a tea strainer online for $2.00 and took the stainless mesh off, then cut a hollow tube to length drilled out 2 stainless washers the same diameter as the tube then hammered the mesh over the washers. It then slides on the bolt thread as in the picture.
I nice soft puring engine would be the icing on the cake rather than one that's pulsating your ear drums
Yes the Kirby is certainly a bit of a Bambi' Friend. "Thumper" and their muffler was never much chop if I may say so.
One main thing to consider though is increasing the amount of restriction will always have adverse effects on engine performance and the more free flowing exhaust it has will give more power.
I guess you'll find out once you have it in situ and driving the mower.
Cheers, BB.
I live a 24 Hour lifestyle, but every now and again I seem to fall asleep, well at least that's what my wife tells me.
That was my only concern was the amount of flow, it's a fine profile mesh but it has plenty of holes, alot of baffles I have seen have bigger holes but more spaced apart and there usually on bigger engines. Like you said it's trial and error, I will test it with and with out the baffle as it's easy to remove and see the difference. Who know it might work great (fingers crossed).
it doesn't take long for soot from an engine to clog up perforated holes inside baffles etc. thus why many engines fail to start with a clogged spark arrestor over time.
cheers, BB
I live a 24 Hour lifestyle, but every now and again I seem to fall asleep, well at least that's what my wife tells me.
Hi all, New to the lawn mower restorations I am currently working on a kirby HK30 that has no spark what I have done so far is changed the spark plug and set gap, inspected the ignition module for wire damage and cleaned the points. I went to reassemble the engine, flywheel ect and tried to start it but the pull cord won't budge this wasn't an issue before I did any work? Anyone have any ideas on what I have done wrong? I have pulled it apart several times now and refitted but no change. Seems like the flywheel won't spin the engine wouldn't of seized would it?
Thank you that's all I had to do was adjust the coil, unfortunately still lacking spark. Am I better off buying a new magneto section and ignition module instead of playing around with the current one?
Sorry can't help you there I have no idea what coils are available for the H4-4A, BB is probably the best one on that stuff, he should be along here later today
I guess one has to ask the question, was it running prior to strip down if not I suspect and concur with Norm that you have a cooked ignition coil.
Parts for Kirby engines are very thin on the ground and definitely not available as an over the counter part in Australia. If anything is out there it will either have to come from the USA (ouch) or a Chinese copy shipped from Asia. Ebay will probably be your best option I'd say.
Let us know how you go before making any purchases and I will best advise you on how to proceed.
Cheers, BB.
I live a 24 Hour lifestyle, but every now and again I seem to fall asleep, well at least that's what my wife tells me.
Teabag my one concern is did you set the coil gap correctly, the fact that the coil was touching the flywheel means you may not have got the gap right, this may be causing the lack of spark
I guess that's why I asked the question as to whether it worked prior to what's been played with. It would give us both a bit more insight. My guess is no it didn't function, but there's no harm in asking I always say. Sometimes the obvious is just staring us all in the face but we can't see the forest for the trees.
Cheers, BB.
I live a 24 Hour lifestyle, but every now and again I seem to fall asleep, well at least that's what my wife tells me.
I purchased the mower knowing it had no spark but thought I could clean it up and try and get it working. Still hope I can. This is why I had pulled the the engine apart at the start. What I have done so far is new spark plug, cleaned and set the points. I'm struggling on how to get the correct gap between the coil and the flywheel as once I put the flywheel on I can't access it. Is it all just trial and error? Next step is to test resistance on the coil probably should of done this from the start.
Setting the correct gap between the coil and flywheel is rather easy.
I simply use someones business card that I no longer require and place that between the two items while the coil is loose and tighten it up with the card re-creating the gap. once tightened up simply pull the card out and you're set to go.
As far as non working coil is concerned you might find it is just the High Tension lead going to the spark plug that's failed due to outdoor exposure etc etc.
Cheers, BB.
I live a 24 Hour lifestyle, but every now and again I seem to fall asleep, well at least that's what my wife tells me.
Hi Teebag, hope you sort this one out. No spark can be a frustrating thing when you don't know what's causing the problem, sometimes it can be starring at you in the face and it's the easiest fix. Alot of no spark issues I have had with other engines is a simple fix which involves checking the high voltage wire that connects to the spark plug, common issue is that the end of the connector that touches the spark plug disconnects from the wire that runs in the insulated black rubber insulated tube. Most of these connect by a sharp spike pushed through the rubber insulation and touches the solid copper wire inside (sometimes the spike misses the wire or needs to be re spiked to make contact). Check for connectivity from the end connector on the sparkplug side to the point on the magneto to see if it's got continuity. Also check that your coil is not shorted to ground which is what causes your engine to stop when you turn the engine off.
Hey Bon Scott, So I got around to tinkering a little more tonight. I started off by checking if I was getting any resistance reading and I wasn't getting anything what I did next is what you suggested and look more in depth with the contact of the prong, I tried my best to salvage the prong during removal but it broke I'm sure I can just replace it with a spark plug boot. I tested on bare wire and I got a reading which is a good start. As I'm a newby and not really mechanically minded what sort resistance reading should I get? I wasn't getting one off the coil itself as it's covered with plastic but I got a reading off the metal forks once I connected the coil on again. First reading was high 13000 and second was like 18000 does this sound right?
Changing the end prong shouldn't be an issue if it broke. Did you get a reading before the plug broke? Not sure of resistance values, maybe a quick google search can give you a guide, I remember finding a good video on YouTube a while ago that explained how to check resistance and how to charge and check a condenser with a multimeter. As far as I'm aware the only thing that can go wrong is a broken connection a short or dead condensor. also check to see if the points are dirty and need cleaning
Also one of these spark plug testers make life alot easier when checking for spark, you connect it inline with the sparkplug and the coil wire and you don't have to worry about the sparkplug moving off the engine when cranking. Plus it's easy to read when the globe lights up if you get spark.
Update, I got the old kirby started I ended up just replacing the spark prong with a boot and terminal and bang it started. Bon scott thanks for the advice it was staring me right in the face I have a new problem now the mower ran fine for five minutes until I turned it off and went to start it again and the pull cord snapped Lucky it was right at the knot so I managed to fix it. I attached the pull start and now old kirby won't start could I of set something up wrong with the pull start? I had trouble with assembling these few parts spring retainer, dog starter and retainer. Maybe I set this up wrong? Could this be the reason why it isn't starting?
Glad I could help you with the spark issue, 95% of my spark issues end up being the end connector not making contact with the wire. Some engines I have even reverted to soldering the end connector to the wire if it's not a tight connection. As for not starting again well that could be anything and eliminating one thing at a time is probably your best solution. First check your sparkplug and make sure it's not fouled up, if it ran for 5mins that's enough time for the sparkplug to be fouled up if it's running to rich or burning alot of oil. Other thing to eliminate is cleaning the carby, make sure all jets are unblocked and bowl float is not stuck. Also some engines won't start unless the fuel tank is at least half full, Kirby shouldn't have that problem as it's gravity fed and doesn't have a diaghprame but worth a shot. Try restarting with out the air filter if it's got one installed. Maybe check your new sparkplug boot you installed hasn't come lose again with vibration or movement.
This is a photo of my recoil starter I took for reference before striping it down so I knew how to re-assemble it once I cleaned it up. But as long as the rope cranks its not the pull recoil.
For anyone who was interested in the baffle, I got my hands on a complete Kirby muffler intact that's in very good condition. I managed to pick up a model 38 SB edger with a Kirby engine. My baffle design was very close so I'm going to replicate a new one exact to the original and swap the original into my restored engine. I can't believe I found a model 38 with a Kirby to match my model 45 Kirby. Can't wait to get stuck in to the next restoration once I finish the model 45. This engine starts first pull and looks beautiful for its age, I'm almost scared to touch it and wonder if I should leave it original and just wash it down. When I get back home from holidays I will take measurements of the baffle and draw it all out for reference for anyone else who wants to make one.