Hey all, long time no see. I hope everyone is still well.
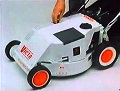
I have a problem with a 160 zip starter, top version. It is not engaging with the engine until the last part of the pull, where it does not have enough speed to start the mower. It has tension and reels in nice and quick on its own. I pulled the starter apart, everything was as it should be. Could the cup be too worn? Or the catch arms that flip out on the starter itself worn?
Hi Sapper, Easy permanent fix is to file a series of slots 10mm apart all the way around the inside of the cup and the pawls will pick up instantly without fail. I have always used a half round file thinking that one side of the file cut has a slight leading edge but I'm not sure if it helps much
Hi Sapper, they're a weird set up. I had that problem years ago. Once they start slipping it gets worse as they start chewing aluminium out and you find filings settling at the bottom. The ends of the starter pawls can wear too and start becoming round on the tips. You can turn them around if you see this happening so the other side of each pawl engages the cup. I think Norm's idea is a good one to turn to if that doesn't work. A utility I recently built has the problem but not as severe as yours.
Ahh, if only victa had kept producing the thumblatch catcher series, they would be in better shape today!
Yeah, I can see how shiny the track inside the cup is. The pawls themselves are in decent shape though. I will just do what Norm suggests and file the grooves in while doing other things. Hopefully sort it out once and for all.
I hope it isn't the crop circle maker mark 2. Did you have to go far to get your hands on one? Still haven't forgotten the phenomenal story on finding your alloy PT Mustang. How's it going? And your $20 green Mustang with the oversize piston. I recently found a white version that succeeded yours then months later got it's catcher! The reverse of my green one like yours in a sense. Catcher needed a bit of minor mending but it's the original that belonged to that mower (most likely at least). Also got my hands on a red Vortex thanks to Tyler giving me the heads up.
Norm, I think that's what I'll be doing to the ute bitsa.
Last edited by Mowerfreak; 10/06/2204:12 PM.
Ahh, if only victa had kept producing the thumblatch catcher series, they would be in better shape today!
I find these starters work really well if the parts are in serviceable condition.
The 2 friction washers and metal washers etc must be dry so cleaning parts with brake clean or thinners and even roughing up the old fiber washers with a file or sand paper helps.The spring can be stretched for more tension if loose.
When first pulling on the starter rope the 2 starter pawls must move side ways if not the starter will slip when starting and as Mf mentioned the 2 pawls must have a good edge (not worn) where they engage into the alloy cup.
Once the starter is right and as long as the starter cup isn't excessively worn the starter should work well.
MF, this one is a machine that someone up the mountains wanted gone, nice early 80's Corsair with a twist; top pull instead of side pull. I will fix the starter up and see how she goes from there, but the guy said it was working before it slipped entire.
The new PT that I got from the Bankstown pawn shop is still in great condition, BUT, the decompressor broke off at the stem that fits into the tube! I couldn't believe it and had no idea how it happened. And the decomp on it cannot be taken apart, so I took one of my spares I have been picking up off dead mowers along the way, took it apart, and used a service kit to revitalise it before sticking it on the PT and now she is going fine.
The old green machine 1984 PT is also still rocking along fine, it rarely gets used after savage looks from my neighbours. The sound of this thing is kind of like Bathurst on a good day, but many don't appreciate the sound like I do
I always liked the look of the white PT's and the white Vortex's. Good find for the PT.
Hi Max, now that you mention it, it DOES take a hard pull to get the pawls to come out. When pulling them normally, they don't seem to want to come out straight away. Could this be a sign of stiffening or something else?
Hi Sapper, bit of penetrene on the pawls and in towards the spring will free it up and with the slots cut in the cup you don't have to worry about the pawls slipping on the cup, they will bite in everytime. If Victa had done this it would have prevented thousands of these machines from being thrown over the back fence in anger. I guess building in a fault is a way of getting people to have to buy another mower
Hi Max, now that you mention it, it DOES take a hard pull to get the pawls to come out. When pulling them normally, they don't seem to want to come out straight away. Could this be a sign of stiffening or something else?
Hi Sapper , that would mean the friction washers are not working and are slipping too much.
The friction washers should hold the centre pawl holder stationary with the centre starter post ,as the starter spins the pawl holder should stay still and when the starter turns it forces the pawls out into the starter cup , this should happen when you first move the starter rope with no effort . Once the pawls engage with the cup, further movement of the starter cord will allow the friction washers to slip from the centre starter post.
MF, this one is a machine that someone up the mountains wanted gone, nice early 80's Corsair with a twist; top pull instead of side pull. I will fix the starter up and see how she goes from there, but the guy said it was working before it slipped entire.
[quote]
Oh right! I misread your original post and thought it said you got a VC -160. The mark 2 has a dodgy height adjuster that lets go as you are mowing! It led to the plastic height detent teeth used for years after.
It sounds like you installed the full crank type decompressor valve with the longer neck as the short PT type is sealed. I never knew you could fit them on. I was given a full crank with a PT one. It was a wonder it ran at all without the thing screwed in all the way home!
Maybe you need to stuff in more exhaust mesh to the green PT's muffler. Beware, the clips can flick off violently if you remove the exhaust without care. One missed my eye by a whisker one time.
Maxwestern, could you explain in detail what order the various washers go on the starter? That's probably got something to do with the partial slipping on mine. I lost track when I accidentally flipped them out when swapping the parts over to another cowl.
Ahh, if only victa had kept producing the thumblatch catcher series, they would be in better shape today!
Mf you just have to remember that the 2 fibre washers (friction washers) are installed with one on each side of the starter pawl holder.
If the starter was apart it would go metal washer ,fibre washer,starter pawl holder ,fibre washer ,steel washer ,spring , flat washer and self taper.
Any lubrication on any side of the fibre washers and the starter will not work correctly (starter slips)
Parts must be clean ,dry and fibre washers must work like a mild brake pad .
The 2 steel washers are cut so they never turn on the centre starter post hence the friction on the fibre washers holds the pawl holder to the centre post until the pawls are locked into the cup and then the pawl holder spins in the fibre washers.
Thanking you maxwestern(!!). I'll be pulling mine apart tomorrow to right my wrongs and I'll be using some brake cleaner to hopefully clean out the silicone lube spray I used.
I learned a lot from this thread.
Ahh, if only victa had kept producing the thumblatch catcher series, they would be in better shape today!
I’ve pulled quite a number mid ‘70’s zip starters apart recently and I've seen a few that people have “lubricated” these are fixable but work poorly. As has been said above, any oil, grease, silicone spray etc on the friction washers and the mechanism will perform poorly. The washers need to be clean and dry and any lubrication of other parts kept minimal so it doesn’t flow onto them.
Another problem is wear on pawls. The edges wear and are no longer able to bite into the starter cup. The pawls were originally cut from bar stock square across and barely deburred. The sharp corner of the square edge is what grabs the cup. Once this square edge rounds over you get significantly less grip. In addition some of the same over-lubrication that seems to have happened with the friction washers can flow onto the pawls and cup, further exacerbating grip issues.
I square up the edges on pawls to restore grip. On some of the older ones a file won’t work very well because they’re hardened, it just damages the file. If a file does work then the pawls are unlikely to have much longevity. I experimented with using a diamond plate sharpening stone to redress the pawls to a square edge and that’s slow but effective.
On the pawls that squared up with a file I heated them to red hot and dunked them in quenching oil before redressing with the diamond stone. I’m not sure this is a good idea as there’s now no rust proofing on them. They are, however, nice and hard. I should probably zinc plate them or do something for rust prevention.
I do lubricate the large starter spring. However, this is very sparingly. Some of these can have some surface rust so I treat the rust first and thoroughly dry the spring before soaking it overnight in monograde oil. I let the oil drip off and then wipe the spring dry of oil using a cotton cloth. The oil, however, penetrates the blued surface of the spring. This provides some ongoing lubrication and acts as a rust preventative while not encouraging dust to stick to it.
There is a large brass washer on the top of the assembly between the housing and spring. This is a wear component and on many of the older mowers has worn wafer thin, I’ve had a couple of accidental cuts from these when replacing them as they wear sharp around the edge. I smear a very thin layer of lithium grease on the bottom side of the replacement washer that faces the spring before assembly. It’s only a very small amount but I noticed on the best of the old starters that I pulled apart that there was a trace amount of lubricant on this surface and emulated that as it made sense to me.
I’m interested in how others approach the same issues.
Yep, most things I try take a while, sometimes they don’t work either. I try to learn from the things that don’t go according to plan. A teacher I really admired had an adage “he who never made a mistake never made anything”. Though more often recently I’m thinking “you should have known that wouldn’t work”.
I used to replace worn pawls but they’re now difficult to get and expensive. When they were cheap and readily available it wasn’t worth fiddling about. I could make replacements myself but that’d take a long time. I may yet do it if these redressed pawls don’t stand up to use.
I’ve done home electroplating in the past so I could plate them to provide rust proofing. I’m working on a few things at once at the moment so any further experiments with mowers will need to wait. I do have some old tool parts that need replating so I could potentially do a batch.
When I first had to take apart my parents zip starter, I spaced everything out in order so I could remember which way it all went back in. These days youtube makes some of these things easier, but don't replace the knowledge gained by the guys in this forum. Still a handy reference to take a peek at while doing it though. This channel in particular from a parts seller is pretty good.
Hi Ironbark, Over the last few days I spent quite a few hours turning up bits so I could fit a Victa blade carrier to a Honda motor I'm fitting on a Ariens self propelled. I hit a bit of a stumbling block, then had another think and then I came up with a much better idea and all the bits I had previously made up are now going in the bin. I keep calling it my R&D, others might call it something else
Just read your comment about the decompressor. No, I got this one of an earlier PT, and those are take apart/repair jobs too. Apart from that, the other difference is that the sealed decomp had a straight "stalk" to put the line on, while the repairable one I took off an older PT has a stalk sticking out 90 degrees from the decomp. Fit is fine between them though.
Interesting. The decomp on my 84 green Mustang is a sealed unit. Must have been only a few early examples that are take apart. Never knew they existed.
I fixed the starter today and look what top it is. It turned out it had a missing fibre washer. Fortunately I had a spare in my container of parts and now it's gripping well despite one of the fibre washer's backing plates being detached. I used brake cleaner to remove any traces of lubricant. I now know what I'm doing thanks to you maxwestern explaining how they operate.
Ahh, if only victa had kept producing the thumblatch catcher series, they would be in better shape today!
Yep when the starter parts are in good condition these starters work well but if you don't have spares , it's not worth spending much money on these mowers if you're selling them ,that's when Norm's fix would be more cost effective Mf.
Outdoorking sell parts for these starters so it's not too expensive to fix the mowers starter, for a keeper.
Yes it's very good that Norm has devised a tried and tested method to get slipping pawls to engage the cup should you be unable to fix the core problem with the zip starter mechanism itself.
Wish I knew this decades ago.
Now should it start slipping likely due to the separated friction washer to it's metal backing, will super glue do a good enough job reattaching to the metal washer with square location hole or is there a specific adhesive you recommend instead like epoxy glue?
Last edited by Mowerfreak; 13/06/2210:15 PM. Reason: Wanted to add something.
Ahh, if only victa had kept producing the thumblatch catcher series, they would be in better shape today!
This is one I just did, I do them all before I fit them saves messing about and pulling the starter off and on. This time I just used a hacksaw blade and it was much easier and quicker than the file, all done in under 10 mins
I would think only one pawl would lock into the hack-sawed line at a time Norm but must be enough to stop the starter slipping.
A couple of points we didn't mention is the pawl holder can't be installed upside down because the pawls will not engage with the cup because of the 2 flat edges on the pawl holder, they keep the pawls straight when they engage with the cup.
The pawls can't be reversed ,the hole in the pawl is off centre in the vertical direction. If you tried installing them backwards the friction washer would not be in contact with the centre of the pawl holder on one side.
Not sure how it works Max, but I think the second it grabs the other side would grab as well. Not that it matters much how it works, they work very well and grab withing 100mm of pulling on the cord and they never slip and I have been doing them this way for a number of years now