|
1 members (1 invisible),
2,480
guests, and
153
robots. |
|
Key:
Admin,
Global Mod,
Mod
|
|
|
|
Joined: Feb 2013
Posts: 63
Trainee
|
Hi Guys,
Can anybody advise what may be wrong with my engine? Installed new rings, gaskets and carb kit but cant get it to start normally. If you pour a little petrol in top of the carb engine will fire and run for a little or for as long as you can balance the fuel supply by hand. Engine would run for 30 seconds or so before rebuild but roughly. Have checked the fuel pick up and it works one way only as expected. All other orifices appear clean and free from dirt. Has to be a fuel issue as have checked points and coil gap. What am I missing?
|
|
|
|
|
Joined: Jan 2009
Posts: 6,926 Likes: 10
Pushrod Honda preferrer
|
Please post the Type and Code, as well as the Model, so we can be sure we are all talking about the same engine. Have you checked the carburetor mounting flange gasket? You probably have either a fairly severe intake leak, or a carburetor malfunction, so we need to go through an investigation process. Meanwhile, please do not put petrol into the carburetor intake of a running engine - it is extremely dangerous. The correct way to make the test is to put a small spoonful into the cylinder through the spark plug hole.
|
|
|
|
|
Joined: Feb 2013
Posts: 63
Trainee
|
Grumpy,
80102, 0224-01, 73061801. Carb tank gasket is new but that does not in my experience mean it is good. Maybe use a gasket sealant?
|
|
|
|
|
Joined: Jan 2009
Posts: 6,926 Likes: 10
Pushrod Honda preferrer
|
That gasket shouldn't need sealant, but the surfaces it clamps against on both sides must be clean and flat. Be sure the carburetor flange is flat: they sometimes get bent. Here is the Illustrated Parts List for your engine: http://bsintek.basco.com/BriggsDocumentDisplay/Z6jmvGVJ1DajI.pdfHere is the Operator's Manual: http://bsintek.basco.com/BriggsDocumentDisplay/lrvvA-wU7eL7hAxB91ObQ.pdfThe engine was made on 16 June 1973, so it's been around a while. It has a Vacu-Jet carburetor, which is a rather simple design and easy to work on. You can see an exploded view of it on Page 5 of the IPL. Note the strange pull-device on the left side of the diagram. That is the choke: you pull it out with your finger and thumb, and it will be so totally choked that the engine will rich load and stall in about 5 seconds even if stone cold. However when you choke it and pull it over twice it will start, and you have only 5 seconds to push the choke all the way in before it rich loads. If you have been trying to start it from cold with no choke (that is with the choke pushed in, as it is in the diagram), you have no hope of success.
|
|
|
|
|
Joined: Feb 2013
Posts: 63
Trainee
|
Hi Grumpy,
Have tried with both choke on and off. Has to be held in the on position as this engine has the auto choke option fitted and needs a throttle cable to be held in place I assume. Choke is a loose fit and maybe was designed this way. Other engines I own have a tight fitting choke but without auto choke. I will check tank and carb flange after work today. Thanks for your advice.
|
|
|
|
|
Joined: Jan 2009
Posts: 6,926 Likes: 10
Pushrod Honda preferrer
|
It sounds as if you have the Choke-A-Matic option. I recall Scott Bonnar fitted it on some SB45s.
If there aren't any air leaks and the choke doesn't make any difference, I'm afraid the carburetor will have to come off again for cleaning. I'm happy to lead you through the process using the Briggs technical manual.
|
|
|
|
|
Joined: Nov 2009
Posts: 134
Apprentice level 2
|
close the fuel mixture screw off then open it 1.5 turns, this is enough to start the engine, if it still dont start then the carby need cleaning
|
|
|
|
|
Joined: Feb 2013
Posts: 63
Trainee
|
Ok have leveled gasket flanges and ensured the carb is clean (it was before). Removed newly installed complete carb kit and double checked all orifices are flowing especially two holes behind needle seat. Re-installed all parts and still no joy. Removed new carb kit (needle, seat etc) and install original unit and we have ignition! Only difference I can see would be the new rubber seat washer supplied with new kit. Old kit did not have this. Will follow up with a photo of each kit soon.
|
|
|
|
|
Joined: Jan 2009
Posts: 6,926 Likes: 10
Pushrod Honda preferrer
|
It sounds as if you are homing on the problem - if you can make it work, you can mix and match parts and see which one stops it working. At the moment I don't know what "seat washer" you are talking about, but obviously it could not run with a washer between the mixture needle and its seat.
|
|
|
|
|
Joined: Jan 2012
Posts: 1,842 Likes: 14
Moderator
|
Going by the parts list, the original setup used a screw-in metal needle seat.
If this has been superseded by a 'soft' seat, the original seat would need to be removed, before fitting the new one.
Pics of the bits should permit us to sort this out.
Cheers,
Gadge
"ODK Mods can explain it to you, but they can't understand it for you..."
"Crazy can be medicated, ignorance can be educated - but there is no cure for stupid..."
|
|
|
|
|
Joined: Feb 2013
Posts: 63
Trainee
|
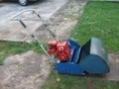
Won't run with rubber seal removed and washers as per original set up. Will run with old needle and new seat. Original kit is in the centre. Regards ![[Linked Image]](https://www.outdoorking-forum.com.au/forum/uploads/usergals/2015/02/full-6466-20087-20150203_194105_resized.jpg)
|
|
|
|
Forums145
Topics13,068
Posts107,298
Members17,870
| |
Most Online16,069
Sep 19th, 2025
|
|
|
|