Well, I did it. I don't need it, but now I have it.
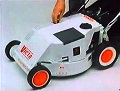
Say hello to what I believe is a Victa VC Autodrive Mk IV.
It is very, very clean. The bloke I bought it off used one as his first mower when he was younger, mowing the Post Office lawn. He purchased it a little while ago for sentimental reasons and it hasn't done much work since as he has used a ride on. I believe I'm now the third owner.
Very easy to start. I think the pull start assembly might need some lube as it feels a bit dry. The rest of the mower has a bit of surface corrosion but nothing too bad. Looks like it was stored in a nice and dry spot. I've hit some of the moving points and height adjuster spring with INOX as an interim measure.
There are two little issues I need to take care of. The first is that the drive is constantly engaged. I suspect the belt may need some adjustment? The drive cable is not tight, but not sloppy. The second is that it leaks around the spark plug. It wasn't in particularly tight, so that might be it, but is is the correct plug? It is a Champion DJ7Y.
Then there is a screw and clip I'm not sure are factory. It's in the picture behind the left rear wheel. The right front wheel has a bit missing from the inner side wall. You can see it in the picture of the blade carrier. The catcher has a small crack, thinking of stop drilling and filling with plastic weld?
After that, I'll be changing the box oil ASAP. I've found some Penrite Fork Oil which is 10W and fully synth. It claims it is safe for copper and brass alloys.
Then what? I'm not sure. It has to be used, so I'd like to give it as much protection as I can. I'm thinking the blade carrier sanded, zinc'd and powder coated. Can you fit a later four blade disc to these things? I'm also thinking of giving the same treatment to the catcher flap, give the handlebars a tidy, maybe clean the head. Unsure if I want to blast the deck and respray? What are your thoughts? Finally I'll see if I can get some reproduction stickers for it.
Last edited by Mystyler; 19/04/2007:02 PM.
I don't collect mowers. I just require Multiple Mowing Solutions™.
Hi Mystyler, that machine is such a survivor I would stick to a patina restore. Clean it thoroughly and leave it's flaws. Many are doing this. Limit painting to clear coating parts that rust easily. Another poster did this with a well kept side pull FC steel deck Victa from the early 80s using car polish in parts and it looked sensational while keeping it's history intact. Why paint the blade carrier when it's only going to get ruined the minute you cut the lawn? I'd only do that if it was to be a display item only. Ages ago a guy fully restored an 80s SPFC Mustang only to spoil it after his first use.
Ahh, if only victa had kept producing the thumblatch catcher series, they would be in better shape today!
Thank you MF for some ideas. I had considered a "patina" finish. That was the original idea for my SB45 but then I went the whole hog with that...
I do love the way it looks. I'm just concerned about keeping it going and not corroding away. So a Penetrene resto you think?
I want to do as much as I can to keep that blade carrier if I can't get replacements. Happy to replace with a PT one, but unsure if they fit?
If anyone has a service or repair manual, that would be handy. I've not worked on a FC, nor a Victa SP mower before. PTs are all I know when it comes to rotaries. I'll keep posting what I do here on the Forum for sure. For interest of others, and I'll be looking for all the help I can get so I don't fluff up a decent example!
I don't collect mowers. I just require Multiple Mowing Solutions™.
It's probably not too bad so long as you didn't lean flat out on the wrench - but you have a taper fit plug not a flat washer fit
Fortunately the thread diameter is the same - so there is less risk of stripping the thread than I thought
You do have less thread reach though - which means some of the threads aren't being used. Might be worth cleaning out the threads a bit before fully winding in the cj8 - just in case it is a bit carboned up in the lower thread
Cheers Tyler. I'll be going to my local mower shop and Repco tomorrow for some essentials. They're within coo-ee of each other.
Thankfully I didn't lean on the spanner! If I can find a gasket at the mower shop I'll pull the head off and give it a quick clean. I didn't twig to think when I pulled the plug and it had no gasket washer.
I don't collect mowers. I just require Multiple Mowing Solutions™.
When you go to get a head gasket, its worth noting they are same as the later PT (although the FC one hasn't got the edge cut outs like the PT one they work the same as both PT and FC have same bore size)
I'd recommend going for the NGK BM6A plug - from my time in the OPE game I don't think well of Champion plug quality, and they're no cheaper. Set the gap to 0.025" before you install it.
Any of the motor trade parts supply shops [Repco, Bursons etc] will have these on the shelf, at a better price than the like of Bunnings or mower shops.
That 'clip' is actually called a 'Tinnerman nut' - and no, it's not ex-factory - you'll have to work out why it's there.
Re the blade disc and catcher flap, powder coating is a major no-no! It gets damaged, water gets trapped underneath it, and away goes the corrosion process - on steroids, so to speak.
For a working mower, I'd just clean off the loose rust with a power wire brush, then brush on a 'fish oil' corrosion preventative, and let it dry. After all, have you ever seen a rusty fish?
Cheers, Gadge
"ODK Mods can explain it to you, but they can't understand it for you..."
"Crazy can be medicated, ignorance can be educated - but there is no cure for stupid..."
If anyone has a service or repair manual, that would be handy. I've not worked on a FC, nor a Victa SP mower before. PTs are all I know when it comes to rotaries. I'll keep posting what I do here on the Forum for sure. For interest of others, and I'll be looking for all the help I can get so I don't fluff up a decent example!
You're going to have to haunt FleaBay for while to find a copy; #103 is the earliest edition that I have on hand, that covers that series of Auto Drive. #424 was the last edition that did so - I have that one too.
Cheers, Gadge
"ODK Mods can explain it to you, but they can't understand it for you..."
"Crazy can be medicated, ignorance can be educated - but there is no cure for stupid..."
Tyler, thank you for the heads up. I didn't end up getting any, as I thought I'd leave it well enough alone for the moment and take care of the 'box first. Oh how I wish I did pick some up. Never mind, I'm going to need a few more parts now. Read on if you dare!
Gadge, thank you for the link. Why didn't I look in Tech Talk? I was too blind looking for a "Manuals" Subforum. To eBay it is. I’ve had a look for the plastic welding kit, but that one in particular has been discontinued. Looks like there are other options out there. I’ll give it a go on a milk bottle first, so I don’t stuff it. Funny you mention powder coating. I’ve heard what you say before, but surely there are powder coats, and then there are powder coats? Like Oils ain't Oils, kinda thing? I’m curious to know how paint can avoid this, when in theory it could trap moisture underneath as well?
Well, what a day. Just like prior attempts, nothing quite seemed to go to plan.
The first order was to see what that Tinnerman nut was holding on. As I suspected, it was keeping the drive cover on over the rear most pulley. No idea how that was put on, but I really didn't want to wreck anything getting it off. Tried "unscrewing" it. Nope. Tried a tiny hacksaw. Nope. Started to get annoyed and got the Dremel. Thankfully, that wouldn't fit... A bit of time spent with a pry bar and screw driver got it out in the end without damaging anything. Looks like the hole in the deck *is* factory though? I suspect that a bolt and nut may have helped hold the cover on originally. I'll work on a more elegant solution later. New air filter and BM6A plug goes in. By that stage, I reckon I'd earned myself a cuppa.
With that cover job for future me, I thought I'd drop the oil out of the 'box, or at least see if there was any. I looked for a drain plug and all I found was what looked initially like a rivet. It isn't a rivet. I think the thead has been mostly stripped. Not having anything at my disposal to rectify this problem, I shifted that job into the future as well and decided to see how the cowling comes off.
Removed the zip starter. A squirt of INOX and a few pulls got that nice and smooth again. A bit of rust under there as you can see in the photos. No to worry, a bit of INOX will also solve that! I'm so clever, job well done there. I took off the Prismatic fuel cap and set that aside. I undid the screws and lifted the cowling off. I didn't need to remove the fuel cap! Fuel cap back on, fuel hose removed. Oh, hello, a spring and another press clip thing, complete with zip tie!
Now I'm really curious. The drive worked, but it never really disengaged. Originally thinking that might have something to do with the cable tension, it had me confused a bit. So off came the other drive cover to see what, exactly, the cable moved. What I saw didn't look right. The idler pulley was hard up against the frame and pulling the drive lever really didn't seem to move much. Belt was really tight too. Then it dawned on me.
Remember that press clip thing, spring and zip tie? It looks like at some stage, a previous tenant tried to change the drive belt and installed the incorrect one! I tried to reinstall the spring, but the belt was just too tight. I then wondered if the idler was doing any damage to the deck if it was spinning and hard up against it. Time to remove the motor so I can get this belt off!
That didn't go according to plan either. The blade carrier nut is too big for any impact sockets I have, or any spanners, not that there was any real danger of getting it off with a stuffed elbow currently. Decided that I'll hit up Toolmart before work tomorrow. Motor stays on.
So, still worried about the idler, I cut the belt off. From memory it was an M31. I don't know what the correct belt is, but this most certainly was the INCORRECT one. Way too small. Looks like it was put on and then pushed into the corner of a shed, only to run again when I picked it up. Thankfully, I didn't decide to run it over the lawn right after I got it, as It had already started wearing a groove in the deck.
With no real progress made, the idea of actually mowing the lawn seemed like a great idea. No drive belt means no hole being chewed in my deck, so it was reassembled and despite looking blue and two-strokey, the fuel in the tank was drained and I put in my fuel which I know is 25:1. Doesn't look as blue, but who knows what the ratio was of the old fuel, and I put Sta-Bil in mine which changes the colour. Excellent! Fueled up, Zip-Start on and...
Nothing.
Not a damn thing. For some unknown reason the Zip isn't engaging anything. Well, that's got me stuffed as I didn't take it apart. Off it comes again, I have a look at how it works, and the penny drops. That INOX I sprayed in the starter cup housing thing seems to prevent the little spring loaded metal pawl things from grabbing. I guess the thing needs friction to work. On goes some de-greaser and a serious wipe down with a rag. Zip Starter on. After a few pulls it finally engages but not reliably and only in about the last 1/5 of travel. Nevermind, I figured I could see if it would start anyway.
What a magic motor! The tiniest of engagement and away it goes! I don't like asking too much of a motor straight off the bat, so I let it warm up for a while. I'm pretty sure the PT manual states a warm up time, so an old FC is just as deserving. In all the excitement noise and aroma, I forgot to put on the catcher. Motor off. Catcher on. Hot start position and away we go!
We're cutting! She's warmed up now, so how about we go MAX CHICKENS and push that throttle lever to the "firewall!" Man, this baby is loud. Is it over revving? Dunno, never had an FC before. Bit of smoke coming out from under the cowl. Or is that under the deck from the exhaust? Hard to tell. Smells a bit hot. *@$% WAS THAT A SPARK?! ABORT, ABORT!
Mild panic has set in. I'm starting to feel that the only FC I have ever owned is now about to burst into flames. How has this happened? A lot of smoke under the deck now, and she smells hot. Oh man, did I straight fuel it? I've never misfueled anything IN MY LIFE. These thoughts are going through my head as I think back to the colour of my fuel. Was it the right container? Check. Did I not pour in oil before I filled it up just recently? I remember throwing the empty oil bottle out, but can't specifically remember adding the oil to the tin.
I now don't trust my own fuel tin.
Now convinced the spark I had seen was molten piston ring, off comes everything. Starter, cowling, shroud, head, exhaust, cylinder. Actually, it doesn't look too bad. I've seen running PTs in worse condition. Rings are nice and free and springy. So now I've pulled the motor almost completely apart, the blade carrier is still on and the deck is covered in junk. Just great. Usually my mowers will be given the "Joe Carroll Special" treatment of degreaser and a pressure wash to minimise foreign object debris before I pull them apart. Too late, it's done now. This is going to be a slightly more detail "touch up" than anticipated.
Tomorrow is a new day. At least the Greenfield finished off the lawn for me. And after looking at the muffler, I reckon the spark was hot carbon shooting out the massive hole that had rusted away. Such is life!
Pictures and captions for your amusement.
Last edited by Mystyler; 21/04/2001:56 AM.
I don't collect mowers. I just require Multiple Mowing Solutions™.
Bugger. I have done the same thing myself in a rush and eagerness to use things (not straight fuel but other things). If its any consolation here is a photo of the piston from my Ozitio Leaf blower. Dropped a washer off the carby stud and bounced into the carb off the choke plate when pulling the carby halfway through use as it carked it (bad metering diaphragm). As soon as I revved it - bang grind.
Another piston and some cleaning up and away it goes again
Can't compare ozito to an old victa, but the level of p*ss off is the same when you start thinking 'What the f just happened'.
I am betting it was a bit lean on the oil but not straight
Stick a icecream/yoghurt container full of the suspect fuel outside for a few hours - it will go dark (as the petrol evaporates and it goes toward 12:1) and eventually almost pure oil if it had 2 stroke in it.
It looks about right for a 40+year old mower- this is the bore of my old VC sports and it runs perfect. Note fire extinguisher in second photo just in case
Originally Posted by Mystyler
Nothing.
Not a damn thing. For some unknown reason the Zip isn't engaging anything. Well, that's got me stuffed as I didn't take it apart. Off it comes again, I have a look at how it works, and the penny drops. That INOX I sprayed in the starter cup housing thing seems to prevent the little spring loaded metal pawl things from grabbing. I guess the thing needs friction to work.
My sincerest apologies, I thought about typing that and completely forgot as I have done the same thing on my old Victa Monaro
What you will have to do is undo the end (its either a phillips screw or e clip depending on model. Then a spring, then a metal washer, then a fibre washer, then the pawl assembly, then another fibre washer, then another metal washer. Get all the oil out and sometimes you may even have to sand the fibre washers as they get a glaze on them anyway.
Originally Posted by Mystyler
Is it over revving? Dunno, never had an FC before.
If you feel its really motoring upon rebuild, turn the little black knurled knob the vac line goes into in your 4th photo left or right. It controls rpm. They are a bit louder than a PT, but have a sweet note.
Do yourself a favour and try to track down some Penetrene for the stubborn bolts - it is absolutely the best. Expensive but worth it.
I did a major service on my car a few days ago - turns out the previous mobile d*ckhead (before I bought it) put in regular copper plugs not platinum (they were worn out to .060 gap) and torqued them down that hard I couldn't get one of them out - one spray of penetrene and ten minutes later it just came out.
Also worked out he put in straight water in the radiator and put green coolant just in the clear overflow bottle - which is just shonky. On the plus side the car now runs spot on.
Having full service history means absolutely nothing. haha
I’ll give it a go on a milk bottle first, so I don’t stuff it.
Ahh, no - milk bottles are Low Density PolyEthylene, catchers are High Density PE. Very different materials to weld. Look around for a plastic bucket - they're HDPE. The Recycling Symbol for HDPE is 2, BTW. Re the plastic welder, yes there are alternative kits available; I just linked that thread to show a nice welder kit example, really.
Quote
Funny you mention powder coating. I’ve heard what you say before, but surely there are powder coats, and then there are powder coats? Like Oils ain't Oils, kinda thing? I’m curious to know how paint can avoid this, when in theory it could trap moisture underneath as well?
Well, there are two aspects to that. One is the quality of the bond formed between the metal and the coating - paint will bond better, to a well-prepped metal surface, as a rule.
T'other is the mechanical strength of the coating; when a paint coating fails or is chipped by object impact, it will lose local film integrity, and flake off - but the flake size will be limited to the area where the coating/metal bond has been destroyed.
Powder coats however, will lift off the metal surface, but remain an intact film, with a small gap between the coating and the metal.
This situation is tailor-made for a phenomenon known as 'capillary action' [CA]. The effect of CA is to draw water into this gap, from any 'break' in the coating, and trap it against the metal surface. The powder coat film prevents evaporation of the water, and corrosion cells [corrosion is an electrochemical phenomenon] will be established, and start to gnaw away at the metal, forming rust.
Rust has a volume ~7x that of the parent metal [engineer's rule of thumb], so that will lift even more of the coating away from the metal, and the corrosion will consequently spread very rapidly.
Quote
With that cover job for future me, I thought I'd drop the oil out of the 'box, or at least see if there was any. I looked for a drain plug and all I found was what looked initially like a rivet. It isn't a rivet. I think the thead has been mostly stripped.
Righto, that pic has made all things clear. Yep, that's a rivet, and your machine actually has the AD MkII type gearbox. This one is grease-packed, which is supposedly good for the 'life of the mower'. Don't tackle a re-pack until you get the shop manual - it's a complex assembly. Recommended grease is BP Energrease A0, which is NLA - I'll get back to you with a current equivalent.
Quote
That didn't go according to plan either. The blade carrier nut is too big for any impact sockets I have, or any spanners, not that there was any real danger of getting it off with a stuffed elbow currently.
It's a 1" AF nut; removal calls for a rattle gun, or it can also be done with a long ring spanner, and a 2lb hammer to hit the spanner with. As we did back in the 70s, when rattle guns were a factory/motor racing team only tool...
At the end of the day, you haven't had an irretrievable disaster here, and at least you'll have confidence in the condition of the rebuilt top end. Victa full crank bottom ends are quite bulletproof; only straight-fuelling or water ingress will kill them.
BTW, you're very lucky that the Prismatic fuel gauge is intact - E10 fuel dissolves them! That's been the fate of most of those gauges we see.
Cheers, Gadge
"ODK Mods can explain it to you, but they can't understand it for you..."
"Crazy can be medicated, ignorance can be educated - but there is no cure for stupid..."
Fixing the cup starter is dead easy, file slots in the cup about every 10mm and the starter will grab as soon as you start to pull the cord every time
Have you got a pic of a finished cup? Just to make it clear how to go about it...
I should say here too, that the other way to get the pawls to grip the cup properly, is to ensure that the pawl ends that engage the cup have sharp, square edges. This is so that they will 'bite' into the cup. They can be touched up on an oilstone - IIRC the metal is too hard to file.
Cheers, Gadge
"ODK Mods can explain it to you, but they can't understand it for you..."
"Crazy can be medicated, ignorance can be educated - but there is no cure for stupid..."
Guess I will have to go and do one Gadge, I have done a lot of them and everyone works perfectly, I will take some pics as I go.I use a half round file so that it gives a slight leading edge for the pawls to slip into. Probably would work ok with a square edge file but I haven't tried it. The half round gives me a square edge for the pawl to hit against. As I said I have not had one that didn't work perfectly every time. The slots I'm cutting are probably less than half a mm deep
The slot idea should be a last resort IMO. Only one FC cup starter has ever given me problems and I've had many. Once they start slipping, it gets worse as it chews shavings of aluminum. Putting oil on these starters is a definite no no. Maybe carefully placed graphite powder is ok. Did they even receive any lubricant from new? I would start with compressed air to clean out any debris before any sort of lubricant.
Ahh, if only victa had kept producing the thumblatch catcher series, they would be in better shape today!
G'day MF, No, absolutely no lubricant was anywhere near the pawls/cup, ex-factory.
Bit like the Briggs recoil starter clutches - the B&S spec was to use a couple of drops only of light oil on the felt pad in the top; and cleaned, degreased and dry around the balls.
The only possible place for lube in these starters, is on the starter spring itself, and even there I'd use a solid-drying type, like wax or Teflon spray.
BTW, the pawls in these Zip starters were intentionally designed to be reversible, when the sharp edge wears off one end of them...
Cheers, Gadge
"ODK Mods can explain it to you, but they can't understand it for you..."
"Crazy can be medicated, ignorance can be educated - but there is no cure for stupid..."
No, absolutely no lubricant was anywhere near the pawls/cup, ex-factory.
The only possible place for lube in these starters, is on the starter spring itself, and even there I'd use a solid-drying type, like wax or Teflon spray.
BTW, the pawls in these Zip starters were intentionally designed to be reversible, when the sharp edge wears off one end of them...
I agree Gadge - I only put some silicone spray in the spring when its apart - except the last time it backfired as the spray tube popped off and I accidentally doused the pawls and had to rip it all apart
I have reversed the pawls in the past, but sometimes you just have to do a new set of pawls and/or do the slots in the cup. It's not like anyone is ever going to see it and it works everytime